In this tutorial, I’ll show you how to build a Wi-Fi-based sun sensor using only two parts and a few cables that can control your electric roller shutters via Home Assistant. You won’t have to write a single line of code. You can simply copy the YAML code needed for Home Assistant here. The matching 3D-printable housing design is linked further below. Enjoy building — and thanks for your feedback!
Components You Need for the ESP32 Sun Sensor Project
The ESP32-C3 is an affordable, energy-efficient microcontroller based on the RISC-V architecture. It integrates 2.4 GHz Wi-Fi and Bluetooth Low Energy (BLE 5.0), making it ideal for IoT applications requiring wireless connectivity. In this project, the compact version without pre-soldered pins is used.
The GY-302 BH1750 is a light sensor designed to measure light intensity and brightness. The sensor communicates via the I2C protocol and outputs illuminance values in lux (the SI unit for illuminance). The measurement range spans from at least 1 lux up to 65,535 lux. The sensor is available in various breakout board formats. For this project, the compact version without a plastic dome or pre-soldered pins was used.
Required Parts List


Step 1: Wiring the ESP32-C3 Mini and BH1750 Light Sensor
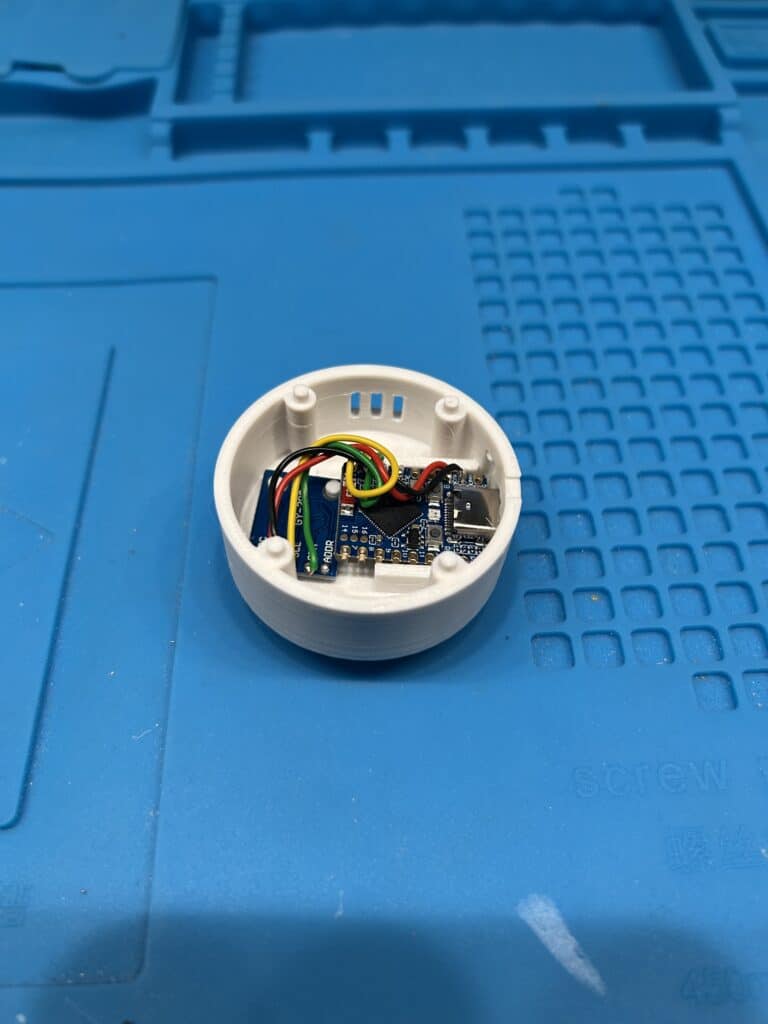
Connect the microcontroller and the sensor according to the following wiring scheme. Note that pin markings on the ESP32 may be located either next to or above the solder pads, depending on the manufacturer — so be careful to avoid mis-wiring.
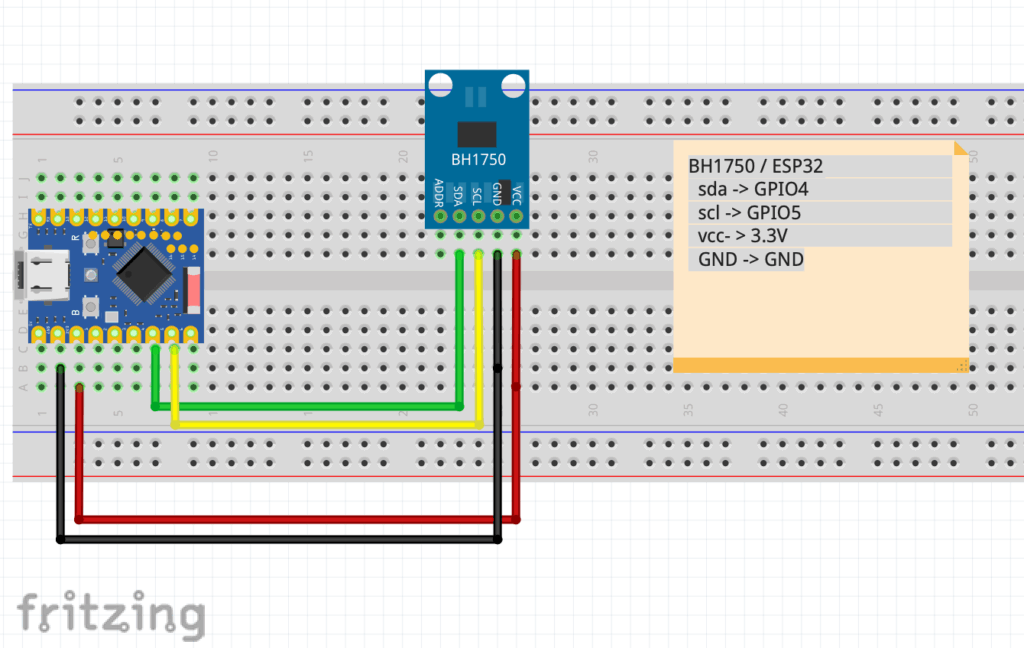
Wiring Table
| BH1750 | ESP32-C3 Mini |
|---|---|
| SDA | GPIO4 |
| SCL | GPIO5 |
| GND | GND |
| VCC | 3.3 V |
| ADDR | – |
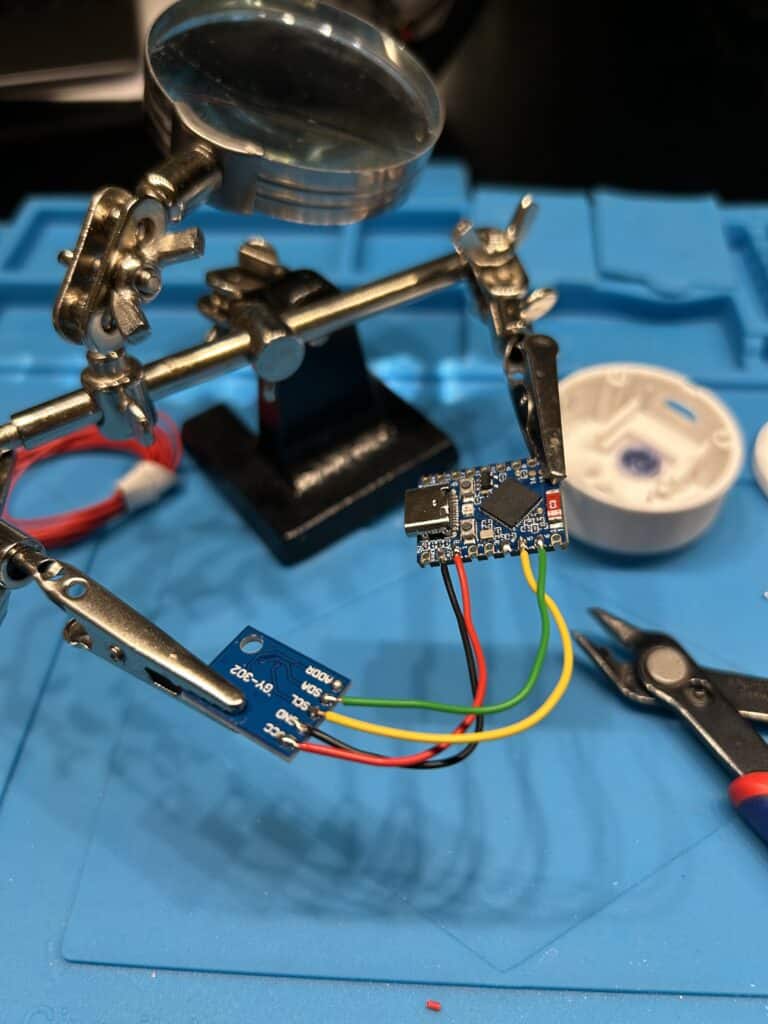
Use ~5 cm cables for each connection. This setup keeps the breakout boards compact and easy to fit inside the housing. Having a “third hand” tool can be extremely helpful when soldering.
Step 2: Integrating Your DIY Sun Sensor with Home Assistant
To use the sun sensor to control your roller shutters, it first needs to be integrated into a smart home system such as Home Assistant.
Home Assistant is a free, locally running smart home platform that lets you centrally control devices from various manufacturers and automate them intelligently — for example, turning on lights when motion is detected, adjusting heating while airing, or controlling electric roller shutters when sunlight is strong — all without relying on cloud services.
(virtual-pinball-cabinet.com)
If you haven’t installed Home Assistant yet, find all important information at home-assistant.io.
1) Install the ESPHome Add-On in Home Assistant
- In Home Assistant: go to Settings → Add-Ons → ESPHome → Install
- After installation, start it and click Open
2) Add a New Device in ESPHome
- Click + New Device
- Assign a name, e.g.,
sunsensor-1 - Select
ESP32-C3as the board - Enter your Wi-Fi credentials
- After setup, click Edit and paste the YAML code below:
esphome:
  name: sunsensor-1
  friendly_name: SunSensor 1

esp32:
  board: esp32-s3-devkitc-1
  framework:
    type: arduino

# Enable logging
logger:

# Enable Home Assistant API
api:
  encryption:
    key: "ENTER_YOUR_KEY_HERE"

ota:
  - platform: esphome
    password: "ENTER_YOUR_OTA_PASSWORD_HERE"

# Wi-Fi network
wifi:
  ssid: !secret wifi_ssid
  password: !secret wifi_password

  ap:
    ssid: "Sunsensor-1 Fallback Hotspot"
    password: "ENTER_A_PASSWORD_HERE"

# Fallback captive portal
captive_portal:

# I2C bus configuration
i2c:
  sda: GPIO4
  scl: GPIO5
  frequency: 100kHz
  scan: true

# BH1750 light sensor
sensor:
  - platform: bh1750
    name: "Office Light Sensor"
    update_interval: 10s
    filters:
      - lambda: |-
          if (isnan(x)) return 0;
          return x;
3) Flash the Firmware to the ESP32
- Connect the ESP32-C3 via USB-C cable
- Click Install → Local via USB
- Select the correct COM port/USB device
- After successful flash, the device appears on your network
Tip: You can also flash the code via the ESPHome web UI (https://web.esphome.io). Connect the ESP32 via USB to the Home Assistant host PC, click Connect, choose the port, and perform the initial flash. Afterward, the ESP32 will be reachable over Wi-Fi and you can update the firmware wirelessly via EDIT → INSTALL → WIRELESSLY.
Step 3: Using the Sun Sensor in Home Assistant – Displaying Light Intensity
After a few seconds, the sensor appears automatically in Home Assistant as an entity such as sensor.sunsensor_1. The sensor reports the lux value, which we will use as a threshold in automation.
To display real-time sunlight intensity in your dashboard, the Lovelace Mini-Graph-Card (available via HACS) works well:
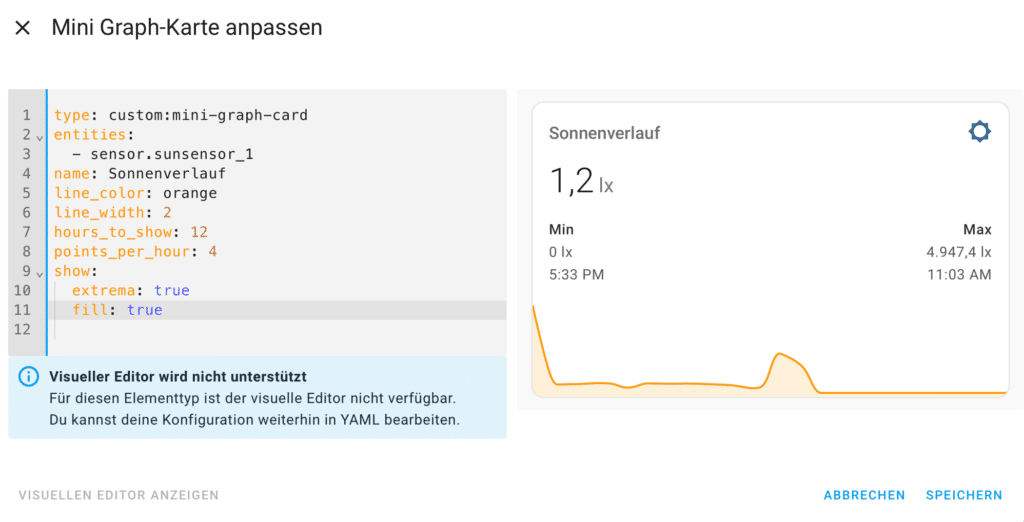
The sun path curve and the displayed lux values shown here are atypical, as the sensor was repeatedly deactivated throughout the day for testing purposes.
Use and adapt the following YAML to set up the graph-card:
type: custom:mini-graph-card
entities:
  - sensor.sunsensor_1
name: Sunlight Levels
line_color: orange
line_width: 2
hours_to_show: 12
points_per_hour: 4
show:
  extrema: true
  fill: true
Step 4: Create Roller Shutter Automations Based on Sun Sensor Values
Below are sample Home Assistant automation YAML snippets that trigger a Somfy-Tahoma scene to close the shutters when sunlight exceeds a threshold. You can also automate re-opening either by time or by sunset.
Automation 1: Close Roller Shutters When Sensor Value Is Exceeded
alias: Close Shutters in Strong Sun
trigger:
  - platform: numeric_state
    entity_id: sensor.sunsensor_1
    above: 30000
condition:
  - condition: sun
    after: sunrise
    before: sunset
action:
  - service: scene.turn_on
    data:
      entity_id: scene.buro_unten
mode: single
Automation 2a: Open Shutters at 18:00
alias: Open Office Shutters at 18:00
trigger:
  - platform: time
    at: "18:00:00"
condition: []
action:
  - service: scene.turn_on
    data:
      entity_id: scene.buro_oben
mode: single
Automation 2b: Open Shutters 30 Min Before Sunset
alias: Open Office Shutters Before Sunset
trigger:
  - platform: sun
    event: sunset
    offset: "-00:30:00"
condition: []
action:
  - service: scene.turn_on
    data:
      entity_id: scene.buro_oben
mode: single
Tip: You can find the correct entity IDs for scenes (e.g.,
scene.buro_oben) in Home Assistant under Settings → Automations → Scenes → Detail View.
Step 5: Optional – Add Manual Override with Toggle Switch
To prevent automatic actions if you manually moved the shutters (e.g., during vacation), add an Input Boolean helper in Home Assistant and adjust the automations accordingly.(virtual-pinball-cabinet.com)
5.1 Create an Input Boolean Helper
Go to Settings → Devices & Services → Helpers → Create Helper:
- Type: Switch (Input Boolean)
- Name:
Roller Shutter Automation Active - Entity:
input_boolean.rolladen_automatik_aktiv
Add this snippet to your configuration.yaml:
input_boolean:
  rolladen_automatik_aktiv:
    name: Roller Shutter Automation Active
    icon: mdi:weather-sunny-alert
    initial: true
Restart Home Assistant.
5.2 Modify Automations to Only Run When Automatic Mode Is Active
Close Shutters When Active
alias: Close Shutters in Strong Sun
trigger:
  - platform: numeric_state
    entity_id: sensor.sunsensor_1
    above: 30000
condition:
  - condition: sun
    after: sunrise
    before: sunset
  - condition: state
    entity_id: input_boolean.rolladen_automatik_aktiv
    state: "on"
action:
  - service: scene.turn_on
    data:
      entity_id: scene.buro_unten
mode: single
Open Shutters at Sunset (When Active)
alias: Open Shutters at Sunset
trigger:
  - platform: sun
    event: sunset
    offset: "-00:30:00"
condition:
  - condition: state
    entity_id: input_boolean.rolladen_automatik_aktiv
    state: "on"
action:
  - service: scene.turn_on
    data:
      entity_id: scene.buro_oben
mode: single
Step 6: Home Assistant Blueprint for Sun Sensor Automation
Here’s a Home Assistant Blueprint that lets you flexibly configure roller shutter automation based on a sun sensor for different rooms and scenes. You need:
- the lux sensor entity (e.g.,
sensor.sunsensor_1) - a scene for closing shutters
- a scene for opening shutters
- an input boolean to enable/disable automation
Blueprint YAML (save as config/blueprints/automation/rolladen_sonne.yaml)
blueprint:
  name: Roller Shutter Automation Based on Sun Sensor
  description: >
    Closes shutters in strong sun and opens them again in the evening automatically.
    The automation can be disabled via an input boolean.
  domain: automation
  input:
    lux_sensor:
      name: Light Sensor
      selector:
        entity:
          domain: sensor
    lux_threshold:
      name: Lux Threshold
      default: 30000
      selector:
        number:
          min: 1000
          max: 100000
          step: 1000
          unit_of_measurement: lux
    scene_close:
      name: Close Scene
      selector:
        entity:
          domain: scene
    scene_open:
      name: Open Scene
      selector:
        entity:
          domain: scene
    control_switch:
      name: Automation Switch
      selector:
        entity:
          domain: input_boolean

mode: single
trigger:
  - platform: numeric_state
    entity_id: !input lux_sensor
    above: !input lux_threshold
  - platform: sun
    event: sunset
    offset: "-00:30:00"

condition:
  - condition: state
    entity_id: !input control_switch
    state: "on"

action:
  - choose:
      - conditions:
          - condition: trigger
            id: '0'
        sequence:
          - service: scene.turn_on
            target:
              entity_id: !input scene_close
      - conditions:
          - condition: trigger
            id: '1'
        sequence:
          - service: scene.turn_on
            target:
              entity_id: !input scene_open
Using the Blueprint in the UI
- Go to Settings → Automations & Scenes → Blueprints → Import
- Upload the file or paste the content
- Create new automations with:
- the light sensor
- a lux threshold
- open/close scenes
- the input boolean control
That’s it. Your sun sensor should now control one or multiple roller shutter scenes automatically.
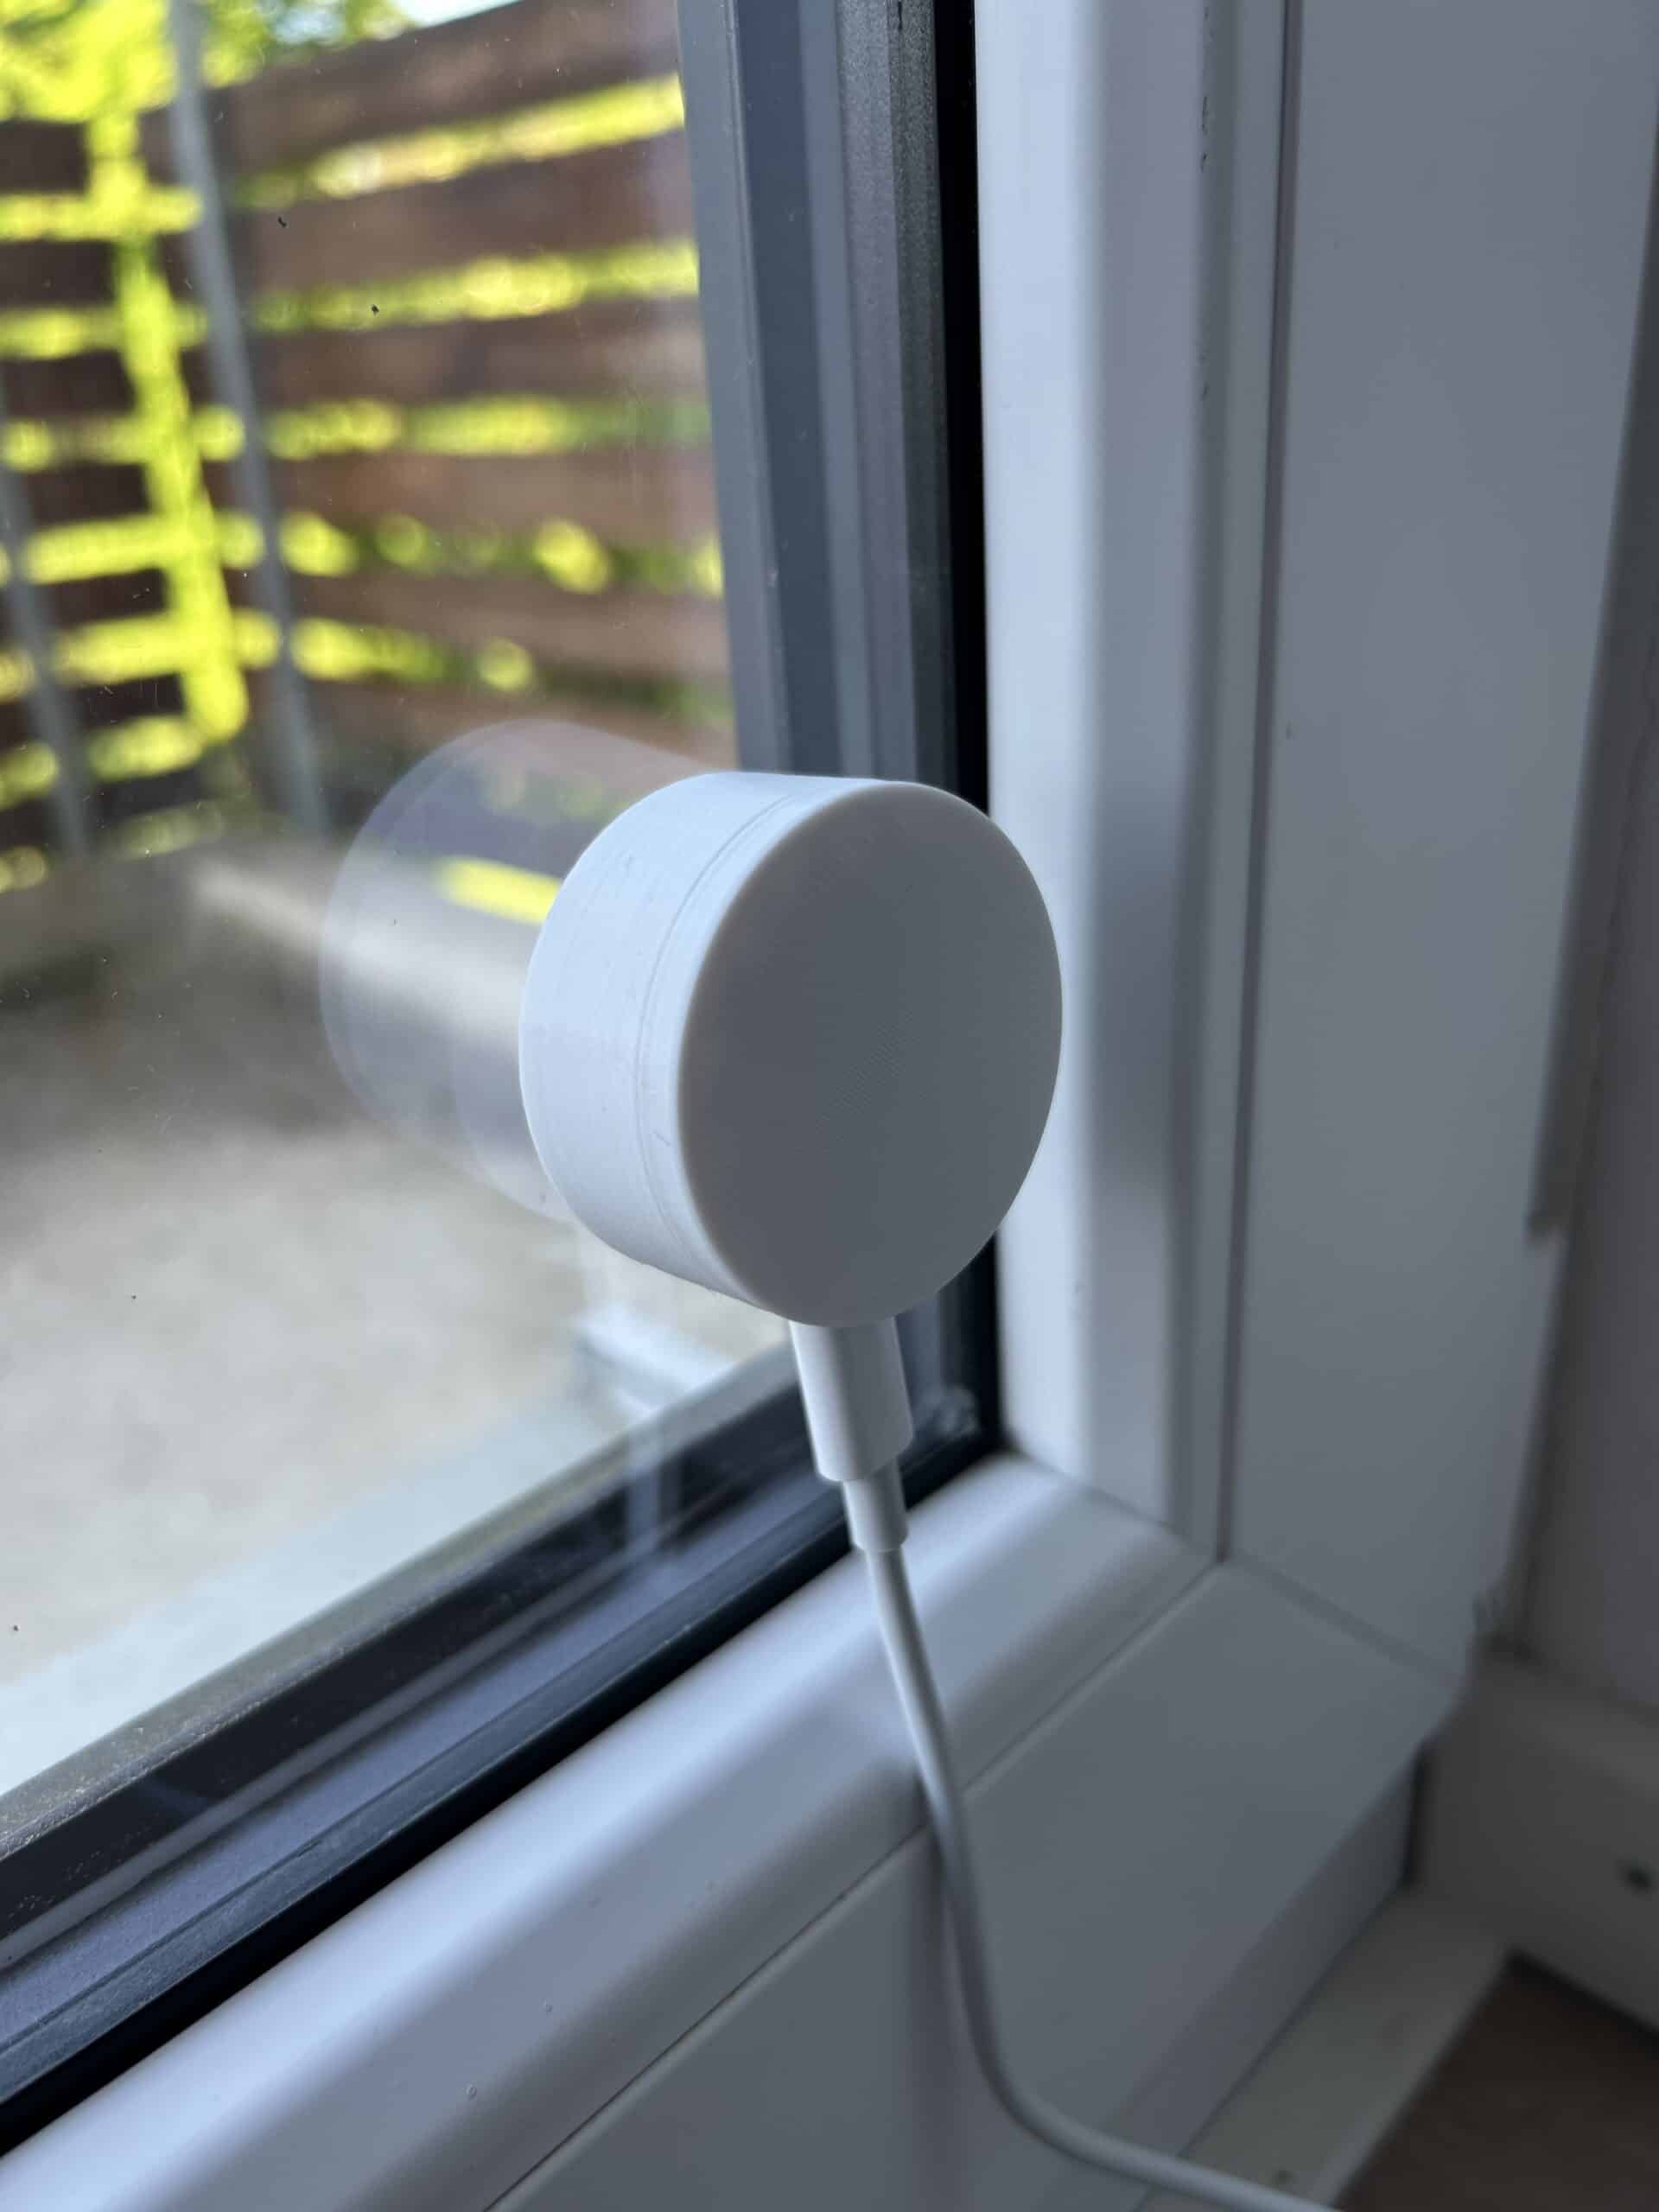
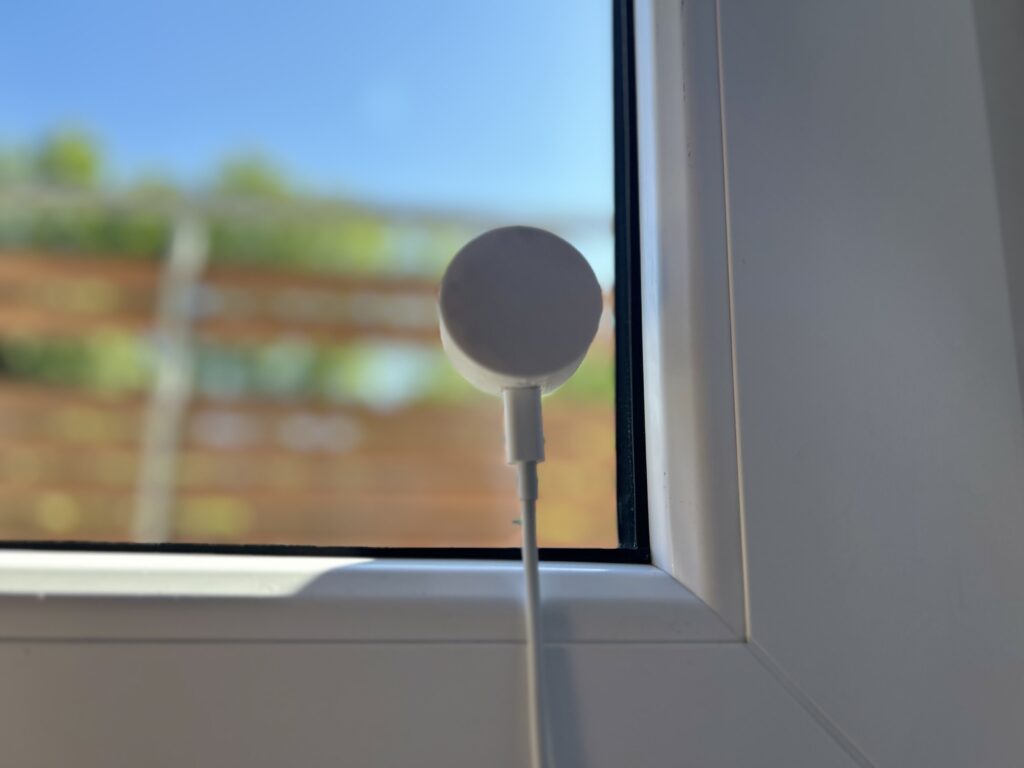
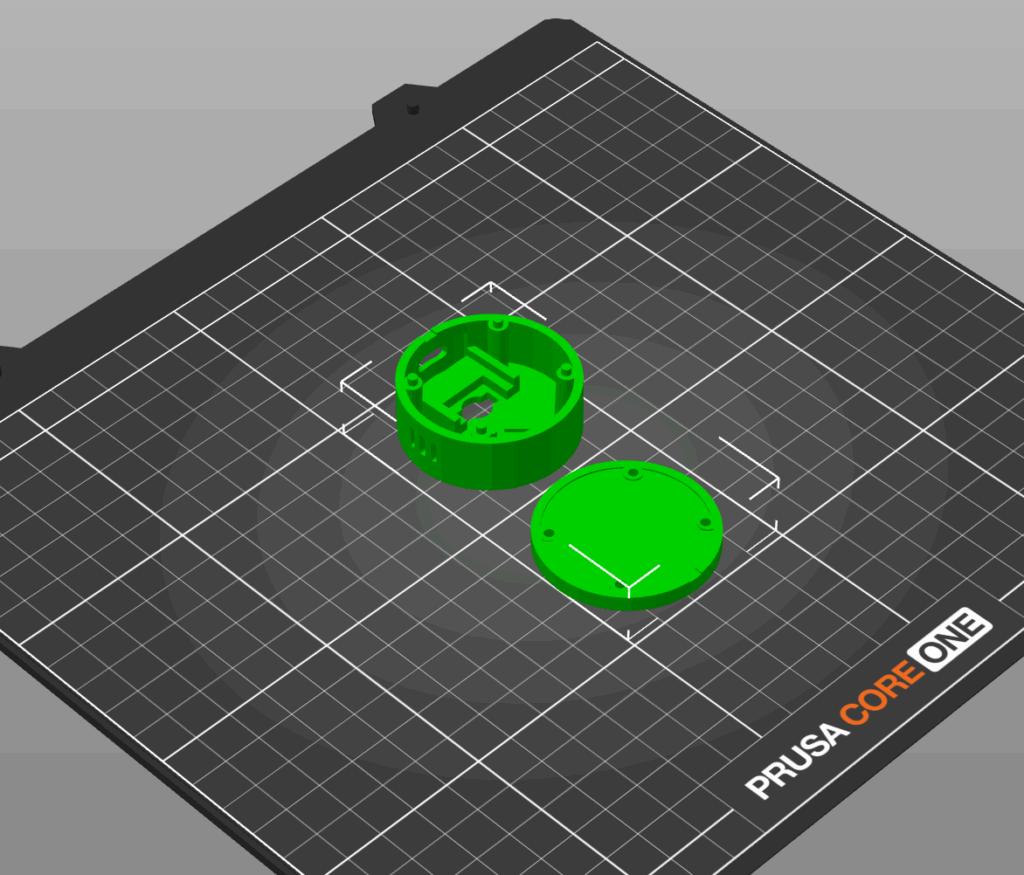
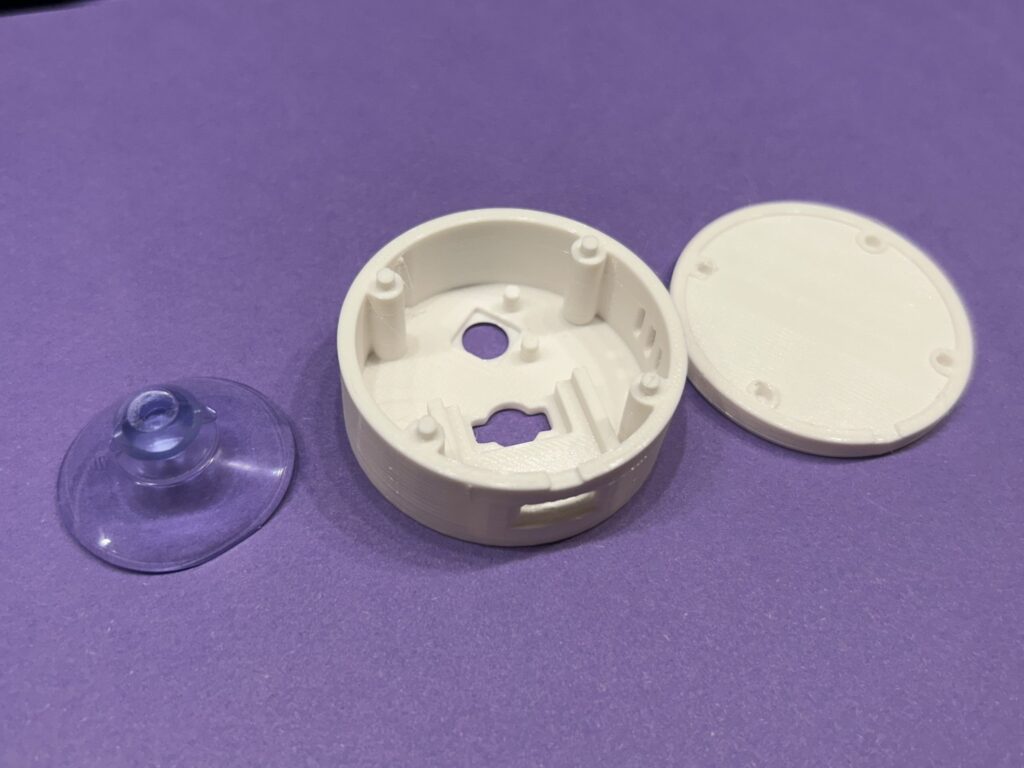
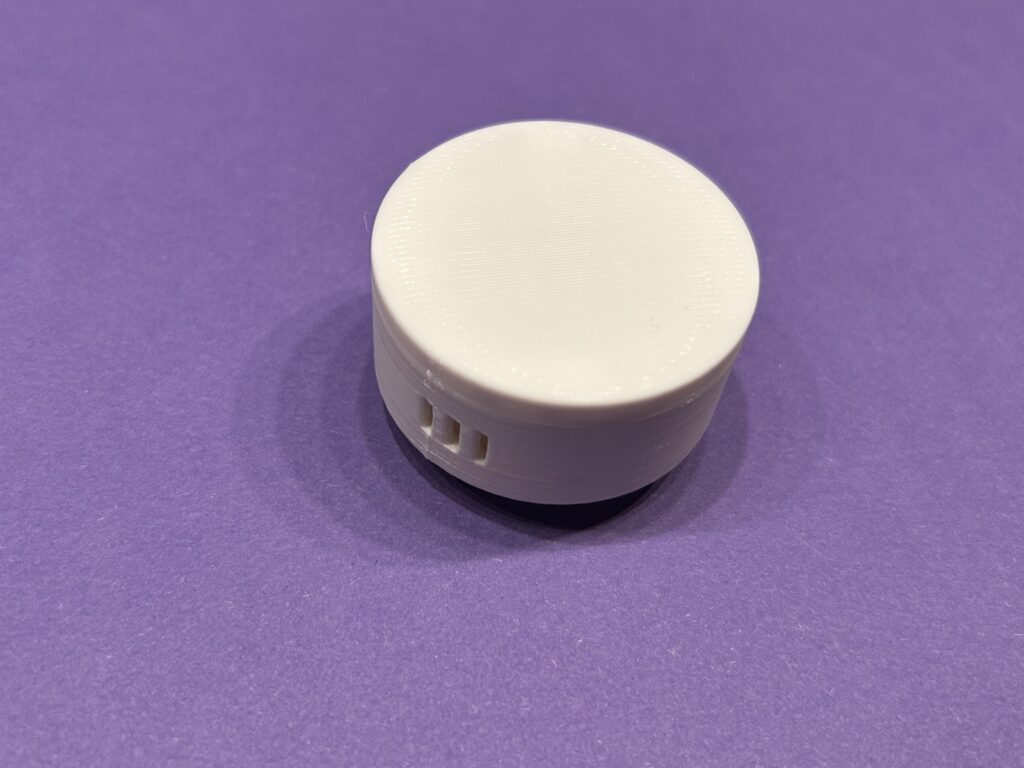
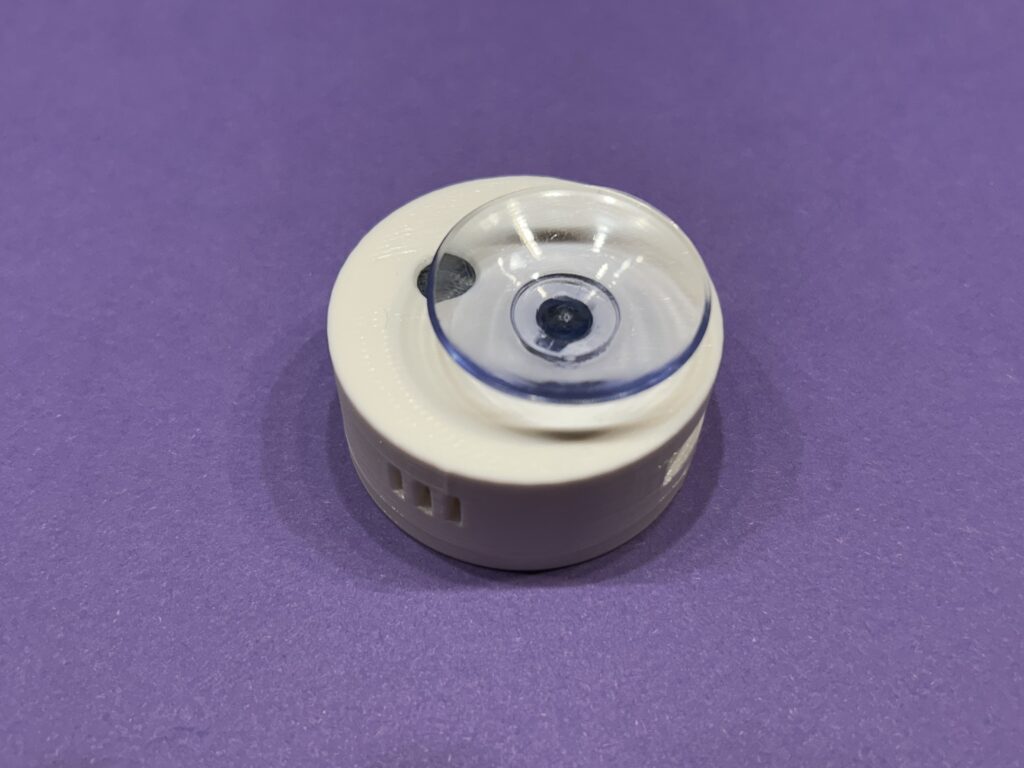
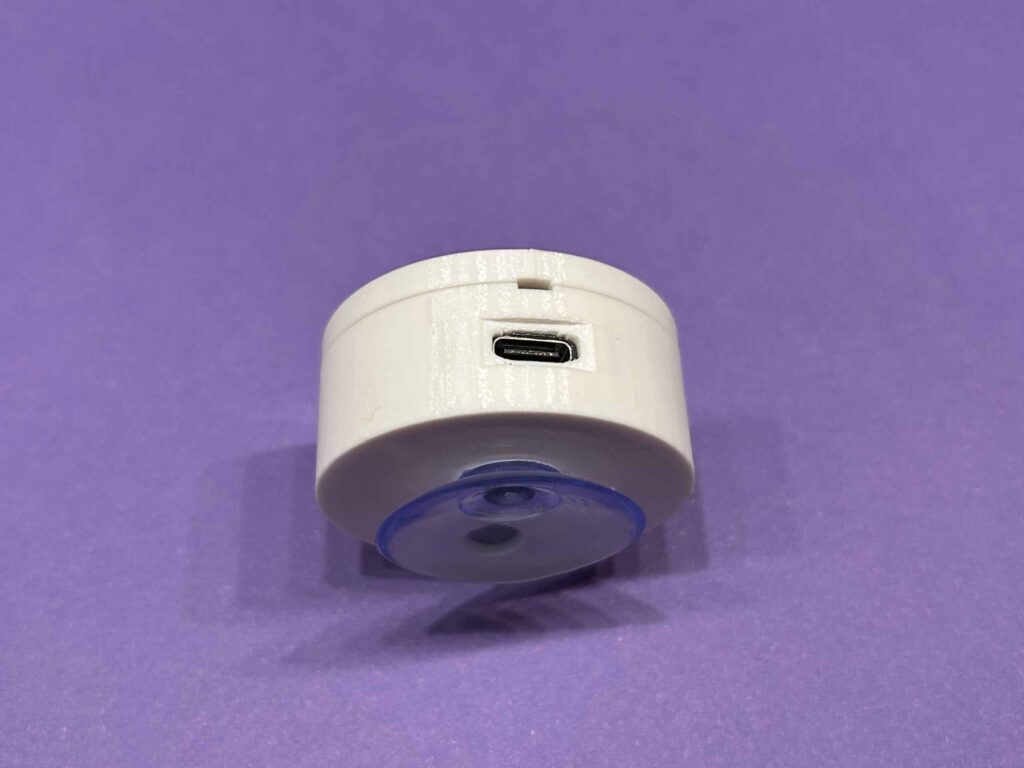
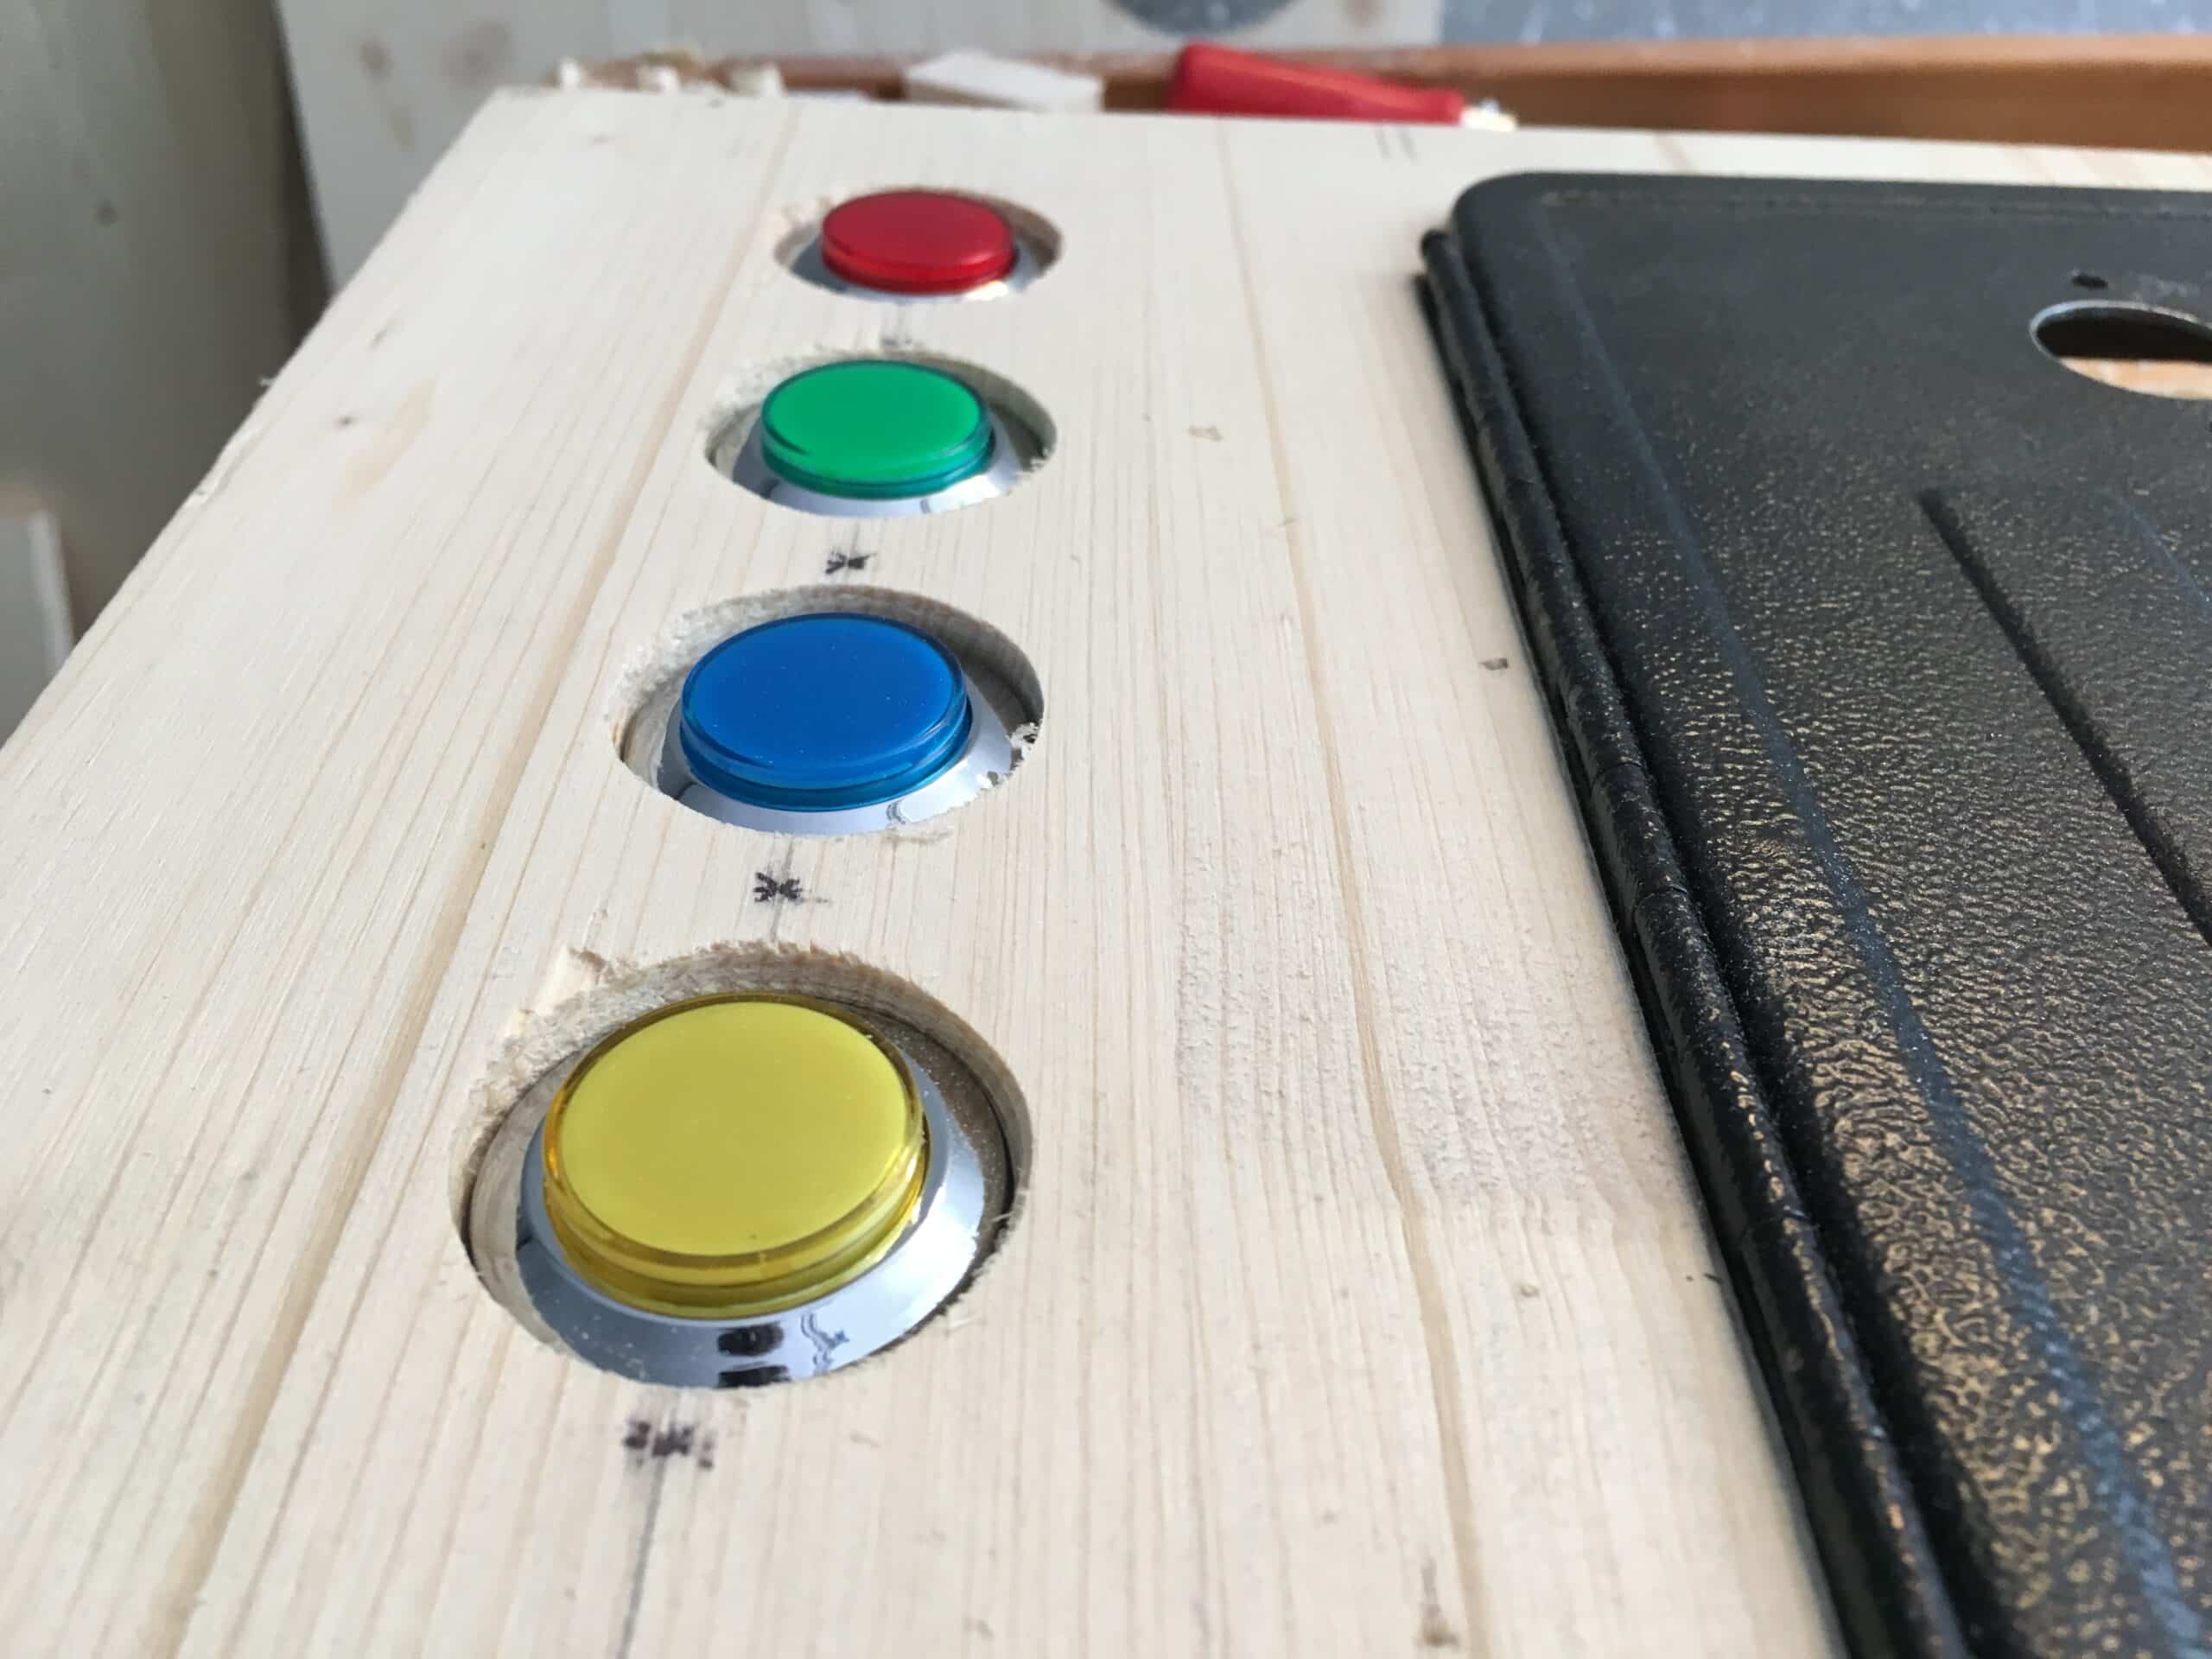
3D Printed Housing for the ESP32 Sun Sensor – Compact and Weather-Ready Enclosure
To safely and cleanly install the sun sensor outdoors or near a window, I designed a custom 3D-printed housing that perfectly fits the ESP32-C3 Mini and the BH1750 light sensor.
The enclosure is compact, discreet, and protects the electronics from dust and minor environmental influences. At the same time, it ensures that the BH1750 sensor remains unobstructed so it can accurately measure ambient light levels.
If you own a 3D printer, you can find the files for the matching enclosure here on https://www.printables.com.
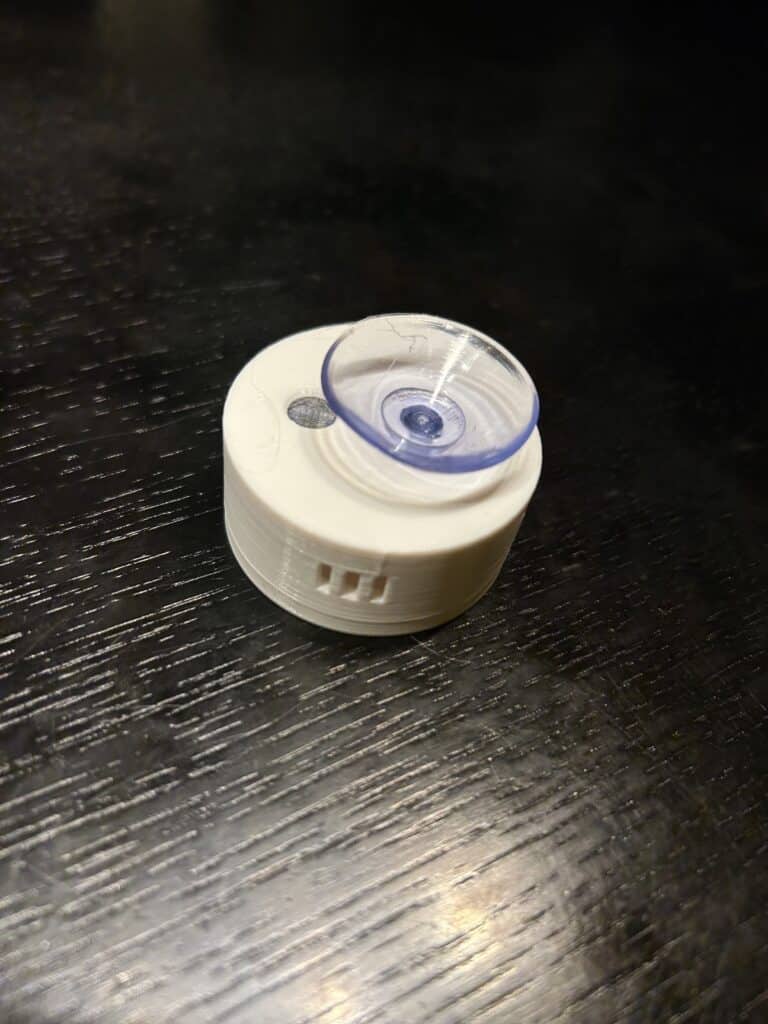
The sensor is secured to the window using a suction cup and powered via a USB-C cable.


That’s it. Have fun building your own Sun Sensor für Home Assistant. Please let me know in the comments, if this How-To was any help. All the best from Munich, Germany, Till
My 3D Printer: Prusa Core One
The 3D Printer I’m using for all my prints is a Prusa Core One. And I’m really happy with it.
The Prusa Core One is a high-precision CoreXY 3D printer designed for technical parts and functional prototypes. Its enclosed design ensures stable temperature control and reliable printing with materials such as PETG, ABS, and engineering filaments.
It delivers high dimensional accuracy, strong mechanical stability, and consistent print quality — making it ideal for electronics enclosures, mechanical components, and functional applications.
https://www.prusa3d.com/de/core-one/
The following Links are affiliate:

- [MOTIVIERENDES DIY-ERLEBNIS] Meistern Sie Ihre Maschine mit unserem weltberühmten 3D-Guide. Der komplette DIY-Bausatz enthält Maßstabszeichnungen (1:1) und erfordert kein Löten. Je nach technischer Erfahrung variiert die Aufbauzeit, liegt aber im…

- Tipp: Es wird empfohlen, die Firmware des 3D-Druckers nach dem Kauf zu aktualisieren, um die neuesten Funktionen zu nutzen.

- 【Personalisierte Komponente】: Unter Beibehaltung der Kernspezifikationen und -funktionen des QIDI Q2 lässt sich das Gerät mit optionalen modularen Komponenten kombinieren. Wählen Sie aus einer Reihe modularer Komponenten und Funktionen, um…


- Sofort einsatzbereit: Der ELEGOO Centauri Carbon wird vollständig vormontiert und vorkalibriert geliefert. Mit automatischer Nivellierung, intuitivem Touchscreen und einem Druckvolumen von 256×256×256 mm (10”×10”×10”) ist er für Anwender…


Leave a Reply