
The starting point of building my virtual pinball cabinet was to set the right dimensions of the cabinet. Whereas the “right” size of a pinball table probably is a philosophy in itself.
Woman fitness diet ~ total bodybuilding sustanon 250 usa josé luis borrego, champion of the mister universe of bodybuilding, over 55 years old.Detailed dimensions of a “standard” or “widebody” pinball table by the major manufacturers such as Williams or Stern can easily be found online:
At first, my plan was to build a wide-sized pinball table. Purists among the pinball builders try to stay as close to the original as possible even during virtual replica.
- https://www.ipdb.org/search.pl. On “The Internet Machine Database” you can download the Documentation for almost every pinball machine as a blueprint for your own project.
https://www.flippermarkt.de/community/howto/cms/pages/technische-unterlagen/geraeteabmessungen/williams-wpc.php (example in cm WILLIAMS WPC).
Dimensions of a “Mid Size Cabinet Pinball”
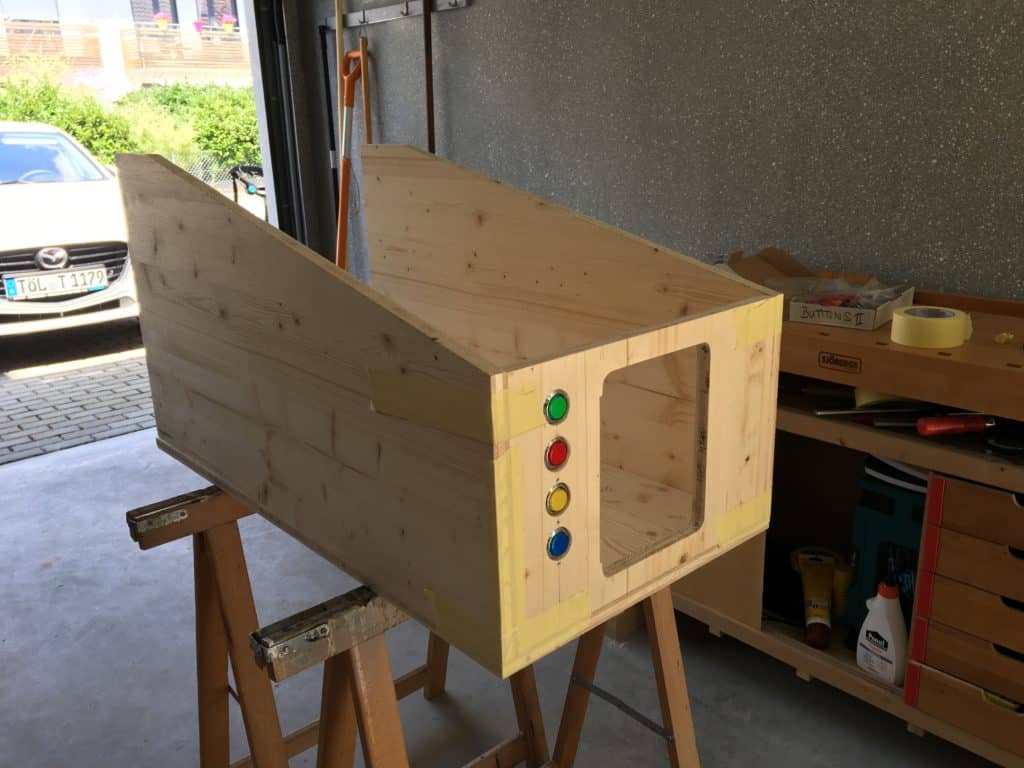
A widebody pinball cabinet with approx. 1.30m depth, 0.75m width and a good height of 1.90m was way to bulky for my gaming room.
I decided to size down a litte: A good solution was a Mid Size Cabinet in approx. 2/3 of the original size. A 32′ monitor for the playing field and a 19′ monitor for the backbox were used. Now having completed the project and played quite some time, still a good joice: big enough for real pinball feeling but not als bulky as a Widebody.
Cabinet: Buy a flatpack or DIY?
If you don’t want to start from the scratch, you could try to get your hands on a used cabinet for a couple of bucks. Ebay or CraigsList are a good point to start as well as the pinball forums. I’m not sure, if cleaning out an old cabinet is much faster than building one, but at least you got the dimensions right – and fixed.
Building a Virtual Pinball Cabinet – where to start?
Easy: buy the Playfield-Monitor and Backbox-Monitor first, even the DMD-Screen, measure, measure again and start from here. Plan your pinball cabinet around your screens. On some projects, I’ve seen people even removing the plastic coverage of the monitors. That’s a matter of taste for sure. For me, I decided it was too risky to expose the electronics of a flat screen.
I would like to recommend two more tutorials which were of great help:
1. The “Pinball Bible”: The very comprehensive “The New Pinscape Build Guide” (Pinscape) by Michael Roberts
2. VPJunkies FAQs by Bambi Plattfuss: https://tinyurl.com/FAQUSE
Which monitor should I use in a Virtual Pinball?
In addition to the dimensions, two criteria are important when choosing especially your playfield monitor: Short response time (<5ms) to avoid time lags on the playfield und a good viewing angle when the monitor is physically rotated by 90 degrees in the cabinet. I am quite satisfied with my choice:
- Playfield Monitor 32 ‘: Philips 23E7QDAB/00 80 cm (32 inch) monitor (VGA, DVI, HDMI, 1920 x 1080, 60 Hz, 5ms reaction time) black (Source: Amazon.de)
- Backbox Monitor 19 ‘: Samsung S19B420BW 19-inch Screen LCD Monitor (Currently no longer available similar Samsung 19 ‘ inch models here at Amazon.de).
State of the art currently probably are 4K playfield monitors with a razor-sharp image. However, these are significantly more expensive and require higher computing power, which should also make the whole project significantly more expensive.
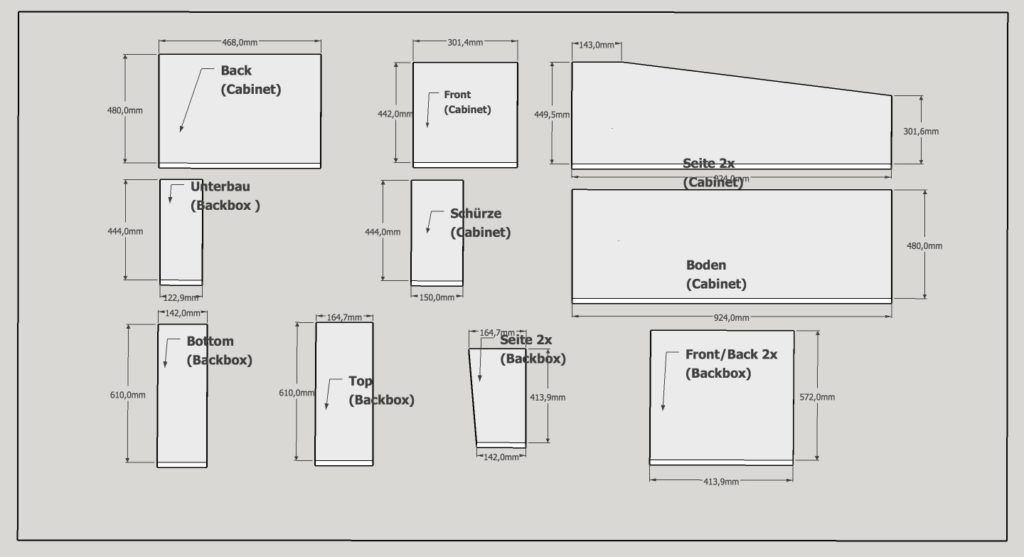
Mid Size Virtual Pinball Cabinet dimensions:
Sorry for European measurement in mm here:
- Length: 943mm x width: 480mm
- Height front: 320mm
- Height back: 468mm
Backbox Dimensions:
- Width: 610mm x height 414mm
- Depth at top: 165mm
- Depth at bottom: 142mm
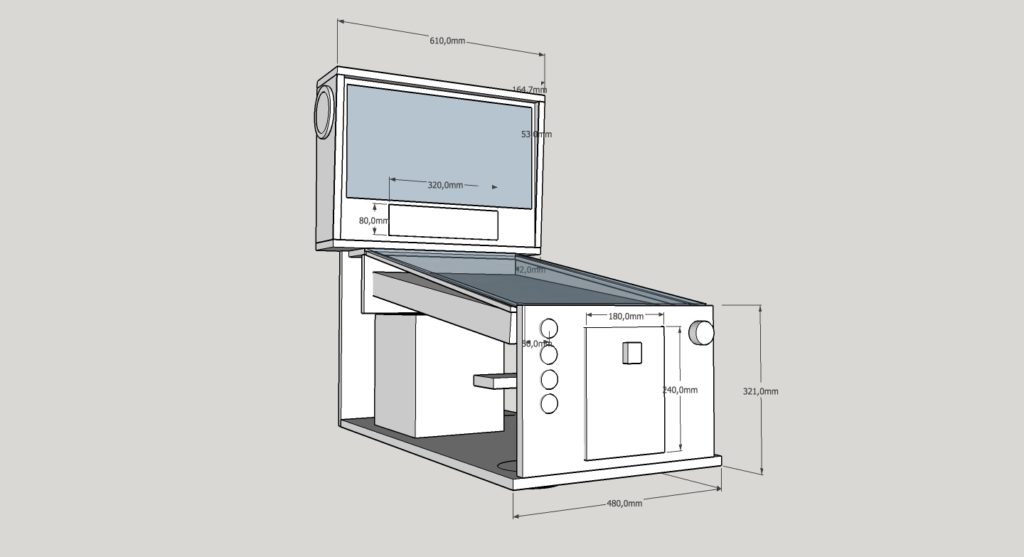
CAD Planning of the Pinball Cabinet
For CAD planning of my Pinball Cabinet, I used the free CAD tool Sketchup 3D Builder. With a little try and error, very helpful drawings can be created and you can quickly see where things could get tight in the later construction. Here are the links:
- Sketchup 3D Builder online version free
- Sketchup desktop version free trial version (temporary – but may be enough for the design of the CAD blueprint)
The professionals among you my please forgive me for the lay sketch. Nevertheless for cutting and during assembly the drawings were very helpful to me.
Dropbox-Link of my Virtual Pinball Cabinet sketches (Update 18.05.2020).
Which is the best wood for a pinball cabinet?
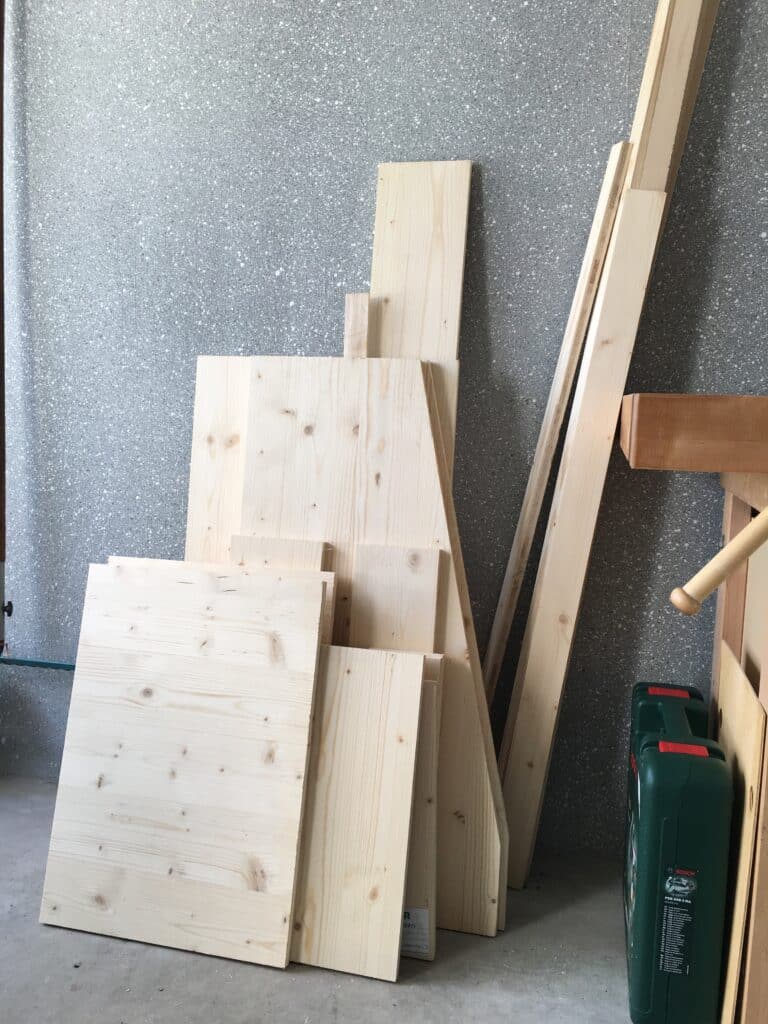
Weight, stability, easy workability and price are probably the most important criteria when it comes to select the wood for the cabinet. I would like to mention, that there are very nicely CNC-cut flat packs for reasonable money available online. So last chance to bail out here…
- MDF plates (Medium-density fibreboard), known from loudspeaker construction (18mm). Finely torn, mainly bark-free softwood is compressed into a wood material that is equally homogeneous in longitudinal and cross-direction (Wikipedia). Advantage: Very fine surface without branches, saves a lot of grinding work, cheap sqm prices. Disadvantage: High weight.
- Plywood (12mm, birch, maple) is a material manufactured from thin layers or “plies” of wood veneer that are glued together with adjacent layers having their wood grain rotated up to 90 degrees to one another. It is an engineered wood from the family of manufactured boards which includes medium-density fibreboard (MDF) and particle board (chipboard). (Wikipedia). Advantage: Very stable. Disadvantage: pretty expensive.
- BCX Plywood (19mm). BCX plywood has a handsome, well-sanded face and a less-finished back side. It typically contains C-grade inner layers and is bonded with exterior glue. BCX comes in a variety of thicknesses and can be made from soft or hard wood. Advantage: Stable, moderate weight, cheap. Disadvantage: lot of sending work required.
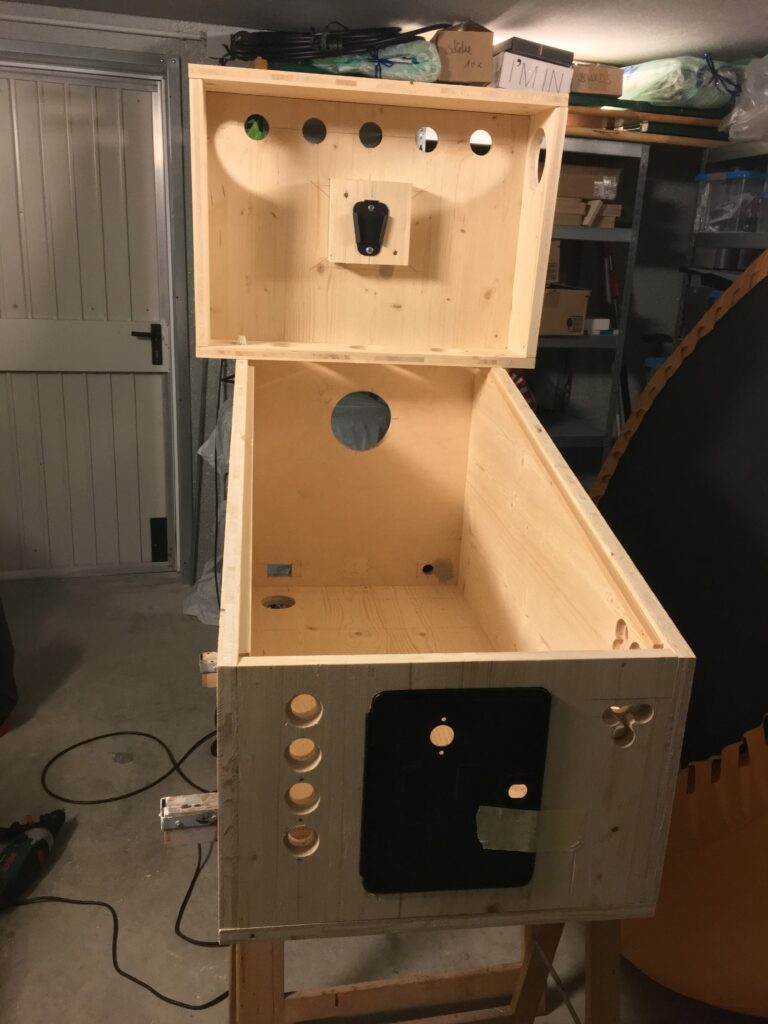
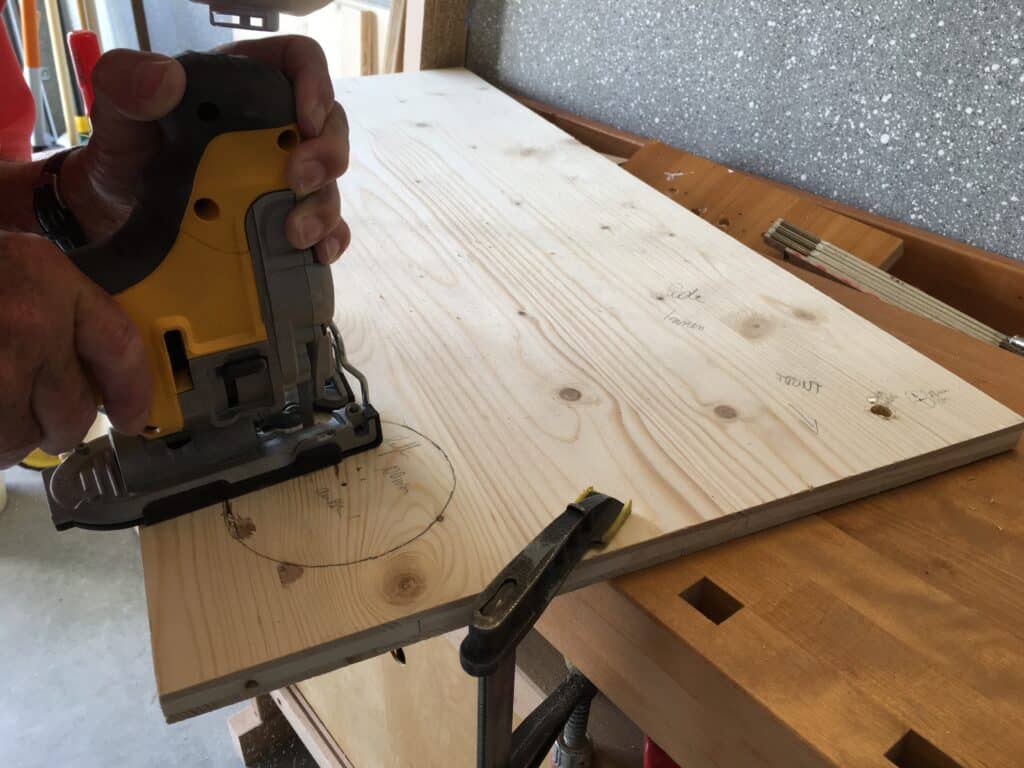
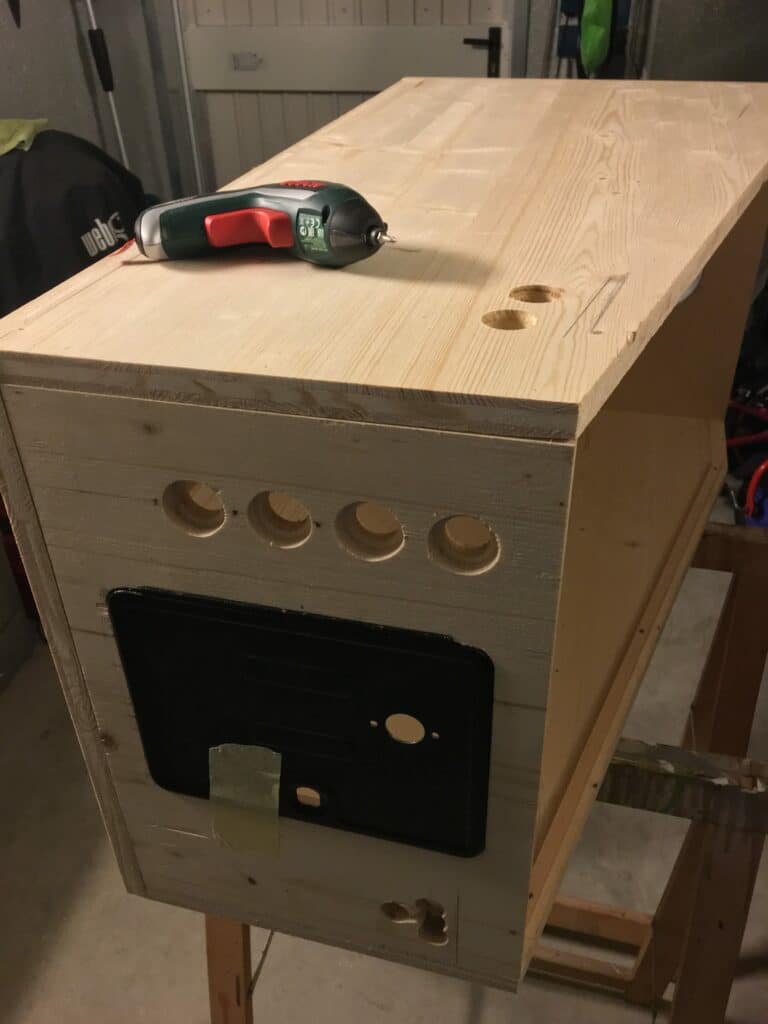
I ultimately chose the 19mm BCX Plywood. The workability was flawless, with the surface I would probably take a higher quality level next time.

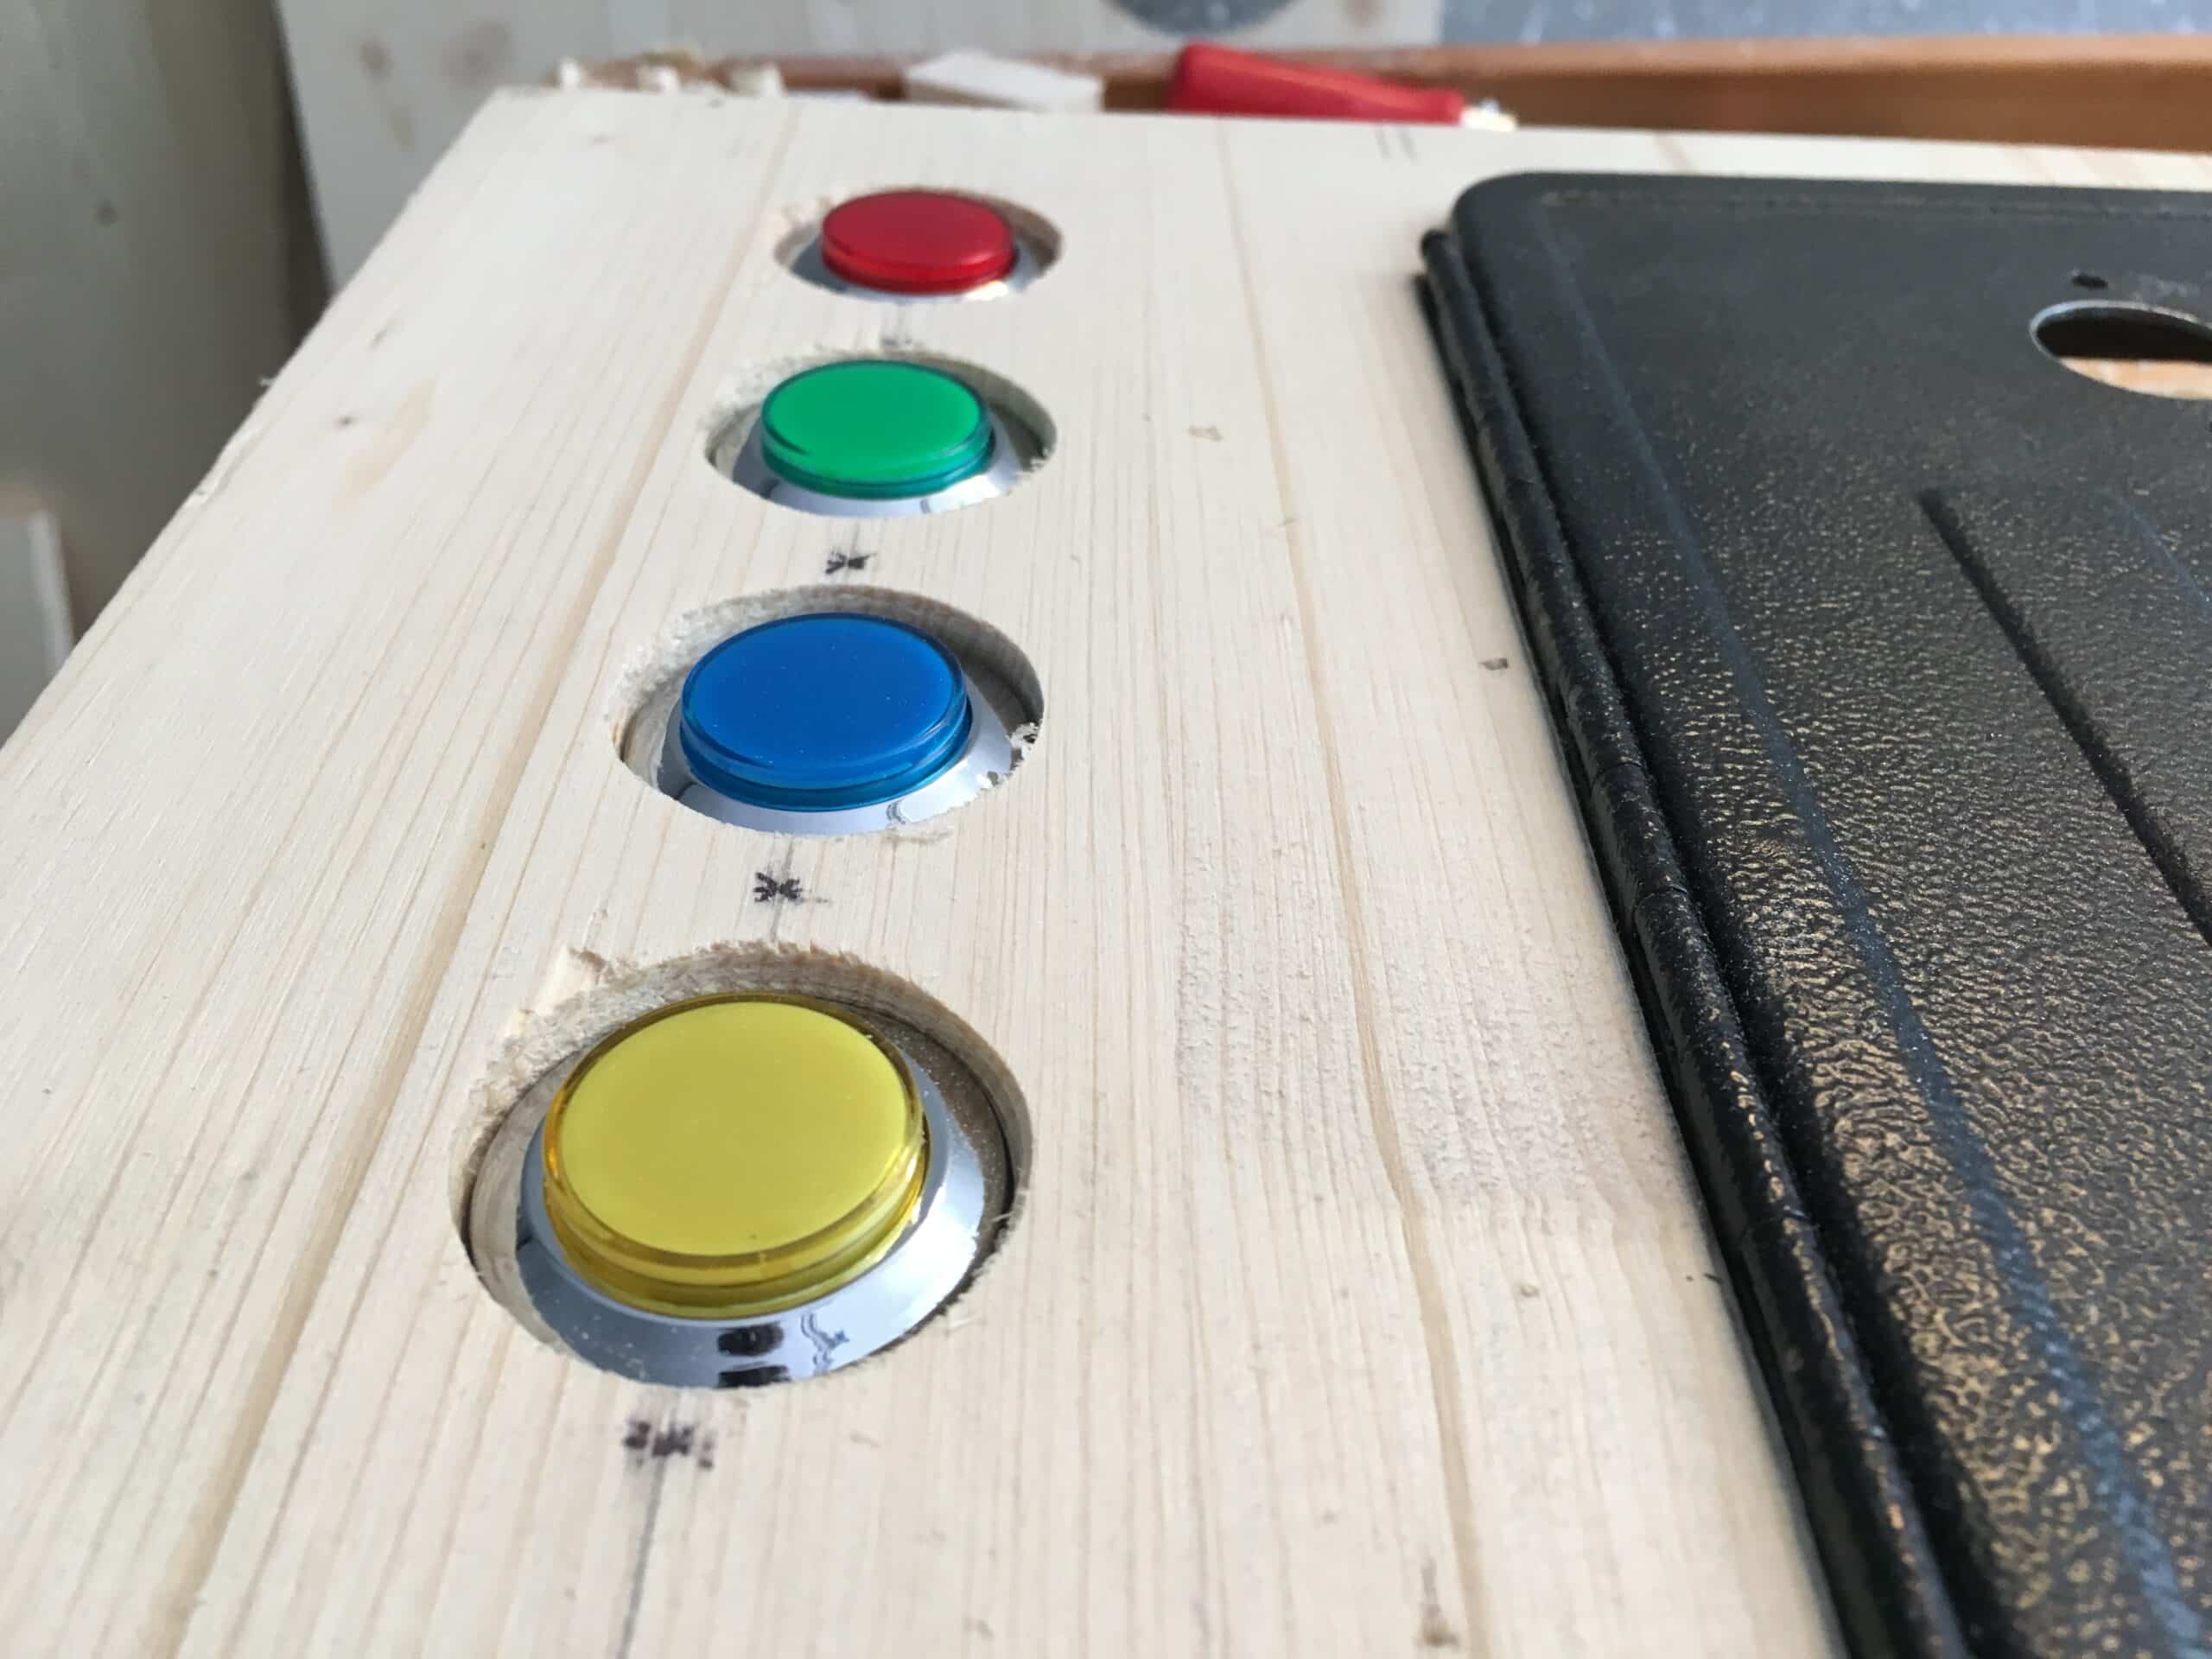
Parts-List for Virtual Pinball:
In the parts section I’ve made a list of (most) of the parts I’ve installed in my virtual pinball and where I’ve bought them: Virtual Pinball machine parts list.
Next Step:
Here’s how I built the backbox of my virtual pinball…


Comments (9)
Kris Szlakowskisays:
15/12/2020 at 12:13hi, where are you located? My father just got cancer and I wanted to make one of these for him, I know all the computer parts and hardware… I just need the wood to be cut. I don’t have those tools. I would love to make a medium one or full sized… I just don’t know the costs, I live in San Diego California, and right now with the Cancer and all of this, its tough to know how much money will be needed for the future… so keeping the price low is a priority. Is it possible to hire you or you know of someone that can cut and maybe paint the cabinet?
It would mean so much to get one done soon. I don’t know how much time we have but I want to try… please let me know, what I can do. THANKS! GOD BLESS and STAY SAFE.
vpintill74says:
15/12/2020 at 21:30Kris, I know what you are talking about. Being located near Munich, Germany I cannot be of help with building it. I would recommend googling “flat packs” for virtual pinballs. You might be able to find packs for smaller sized cabinets and this will save your precious time. All the best to your dad. Don’t loose faith! Till
Howard L Shuresays:
04/10/2020 at 21:20Thank you so much for this tutorial. It is extremely helpful considering I am about to start building my first mini pinball cabinet. I am using a 28″ (25″x14.5″) monitor for the playfield and a 24″ (21.5″ x 12.25″) monitor for the back glass. Would you recommend me changing any of the dimensions as both monitors will fit in your plan as is. Appreciate any feedback you can provide.
vpintill74says:
12/02/2021 at 21:52Hi Howard, I would recommend placing the speakers below the backglass. So you would have
to change dimensions of the backless box. But so far I’m having a lot of fun with my midsize.
Sound is fine for me. All the best, Till
Free Woodwork Plans | Woodworking Projectssays:
19/09/2020 at 12:23[…] Download Plan More @ http://www.virtual-pinball-cabinet.com […]
Animalsays:
04/03/2020 at 16:25Where can I download or get the sketchup plans for the woodwork on this ptoject. Its a perfect size of where I want my build to go and only one I found using the monitors you did.
Thanks
vpintill74says:
18/05/2020 at 19:42Hi, try this: Dropbox Link zum Bauplan
dadoo370says:
26/10/2020 at 09:15thank you very much for this post and plans
I tried building my 1st pinball cab today and it looks awesome with my 32″ monitor 👌
now I just need to find out how the cabling , sound and
solenoid is working
vpintill74says:
07/12/2020 at 17:23Hi Dadoo370, how is your build going? Maybe this is of help for your cable management: Part 7: Cable Management in a Virtual Pinball Cabinet – neat and tidy
Have Fun! Till